Browsed by
Category: Friendship

Stampin’ Up! Full of Charm

Stampin’ Up! Full of Charm

This card is created using elements from the June 2025 Paper Pumpkin Full of Charm, Stampin’ Up! Charming Day Stamp Set, and Stampin’ Up! You Are Remarkable Stamp Set 

Card Cuts

  • Pretty Peacock cardstock
    • card base — 4-1/4″ x 11″ scored at 5-1/2″
  • Early Espresso cardstock
    • mat — 4-1/8″ x 5-3/8″
  • Crumb Cake cardstock
    • art piece — 4″ x 5-1/4″
  • Basic White cardstock
    • inside panel — 4″ x 5-1/4″

The Greeting is from Stampin’ Up! You Are Remarkable Stamp Set.  It is stamped in Early Espresso ink.  To create the flowers on the left side, one of the elements of the Paper Pumpkin Kit is used as a stencil to create the flowers with Early Espresso ink.  The ribbon is a length of ribbon cut into 4 strips with Linen Thread added, then wrapped around the card and tied in a knot.  

Used Crumb Cake ink to sponge around the corners, but it looks more greenish than brown.  Sentiment is from Stampin’ Up! Charming Day Stamp Set.

A Basic White envelope gets flowers from Stampin’ Up! Charming Day Stamp Set stamped on the envelope flap.  The flowers are colored using Pretty Peacock, Pool Party, Granny Apple Green, Old Olive, and Crumb Cake Stampin’ Blends.

I am happy you stopped by today.  I hope you take the time to linger and look at my other blog posts and cards, and that you will join me on my stamping journey as I share my creations with you each day. I hope and wish you will be inspired to create amazing creations yourself. Feel free to CAS(E) any card. If you have any questions, please don’t hesitate to contact me. Have a blessed day!


Questions? You can Contact Me.  I’d love to be your Demonstrator if you need any stamping supplies.  Just click on the Shop Now button on the top right side of the screen to go directly to my online store.  You can Shop in my online store HERE

  • Ready to Join our team?  Click HERE  for more information. One of the perks of being a demonstrator is to pre-order before a new catalog launches, and the Online Exclusives we get to order before they are released to customers.  You will also be getting at least a 20% discount on purchases. If you love card-making as a hobby, you can still be a demonstrator and get that discount to help get more card-making items,  or you can be like I was and buy Stampin’ Up! products for 10 years before I became wise enough to become a demonstrator to get the discount.  When I think of all the stamping products that 20% would have brought over those 10 years, I cringe.

  Being a part of the Stampin’ Up! Community is one of the best decisions I’ve ever made.  Are you new to papercrafting and cardmaking and don’t know where to start, but would like to join to save?  As I said earlier in this post, I’m here to assist you in any way I can.  Ask me!


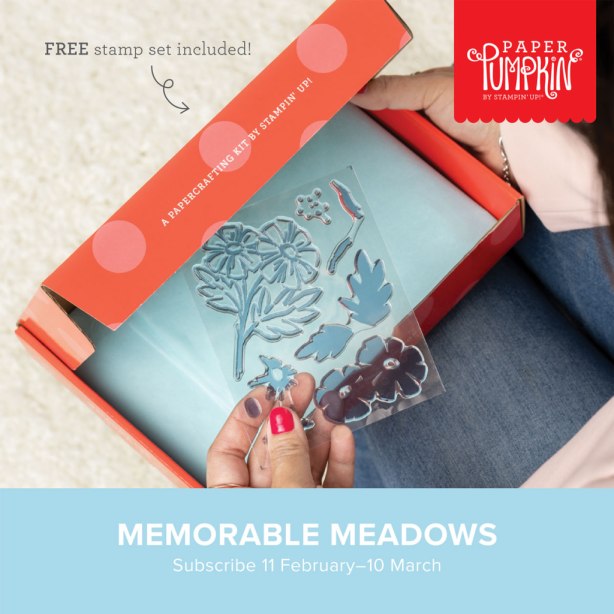
August Farmhouse Florals

Subscribe July 11 — August 10

Send whimsical cards featuring flowers nestled in delightfully unexpected places.
• Makes 9 cards: 3 each of 3 designs with 9 coordinating envelopes
• Precut paper pieces and linen thread
• Sentiment stamps for the outside and inside of the cards
• Coordinating colors: Calypso Coral, Darling Duckling, Gray Granite, Lost Lagoon,
Pecan Pie, Secret Sea (Classic Stampin’ Spot)


Don’t miss the coordinating
Circle of Seasons Dies Add-On!

This exclusive add-on (item 167277) coordinates with the July, August, and September kits! Paper Pumpkin subscribers can purchase it beginning June 11.  Available while supply last.


Stampin’ Up! Products Used In This Project


Blue Balloons For Grandpa

This heartwarming story explores loss, love, and the healing power of remembrance. Through the voice of young Octavia, Blue Balloons for Grandpa offers comfort and inspiration to young readers, showing that love never truly fades — it simply changes shape and floats on in our hearts. As each balloon drifts into the sky, Octavia finds comfort, sending her love, wishes, and special memories up high.

Perfect for those looking for creative ways to celebrate cherished memories.


Stampin’ Up! Floral Impressions

Stampin’ Up! Floral Impressions

Happy Sunday, everyone.  I hope everyone is having a relaxing and fun Sunday doing whatever their heart desires.  To those who have to work on Sunday, thank you.  Today, in Georgia, we are enjoying a partly sunny day, which is much better than the rain we’ve had for the past two weeks.

This is a step fun fold card.  They can be easy to make.  Stampin’ Up! Impressions Abloom Dies are used in creating the card.  We had a stand-alone die set a few years ago that created beautiful cards. I will put a link below for that card.

Step card cuts

  • Strawberry Slush cardstock
    • card base – 5-1/2” x 8-1/2” score at 3”, 6”, and 7”
    • center step – 3” x 6” score at 4-1/2”
  • Basic White cardstock
    • card base mat — 2-3/4” x 5-1/4”
    • card base step mat — ¾” x 5”
    • center step mat – 2-3/4” x 4”
    • inside panel — 2-1/2″ x 5-1/4″
    • oval — 2-3/4″ x 3-3/4″
  • Floral Impressions Designer Series Paper
    • card base – 2-1/2” x 5”
    • card base step mat – ½” x 4-3/4”
    • center step mat – 2-1/2” x 3-3/4”
    • oval card front — 4-1/4″ x 5-1/2″
  1. Add the 2-3/4″ x 5-1/4″ Basic White mat to the card base.  Add the 2-3/4″ x 4″ Basic White mat to the center step. Add the 3/4″ x 5″ Basic White strip to the card base step.
  2. Next, add the Floral Impressions Designer Series Paper to the Basic White mats.
  3. Attach the long portion of the center step to the card front using adhesive of choice, I used Multipurpose Liquid Glue.
  4. Attach the short end to the back of the card, putting glue only on the bottom of the short end.  If you put it all over the short end, you will not be able to open your card.
  5. Stamp a greeting in Memento Black ink on the Basic White oval using a stamp from Stampin’ Up! Comforting Thoughts Stamp Set.
  6. Looking at the above card, arrange the Floral Impressions Designer Series Paper die-cut flowers around the Basic White oval.
  7. Adhere a 2-1/2″ x 5-1/4″ piece of Basic White to the inside of the card base.
  8. Add one of the Stampin’ Up! die-cut flowers to the lower corner.
  9. A Basic White envelope gets a panel of Floral Impressions Designer Series Paper adhered to the envelope flap using Multipurpose Liquid Glue.

I am happy you stopped by today.  I hope you take the time to linger and look at my other blog posts and cards, and that you will join me on my stamping journey as I share my cards with you each day. I hope and wish you will be inspired to create amazing creations yourself. Feel free to CAS(E) any card. If you have any questions, you know you can always contact me. Have a blessed day!


Questions? You can Contact Me.  I’d love to be your Demonstrator if you need any stamping supplies.  Just click on the Shop Now button on the top right side of the screen to go directly to my online store.  You can Shop in my online store HERE

  • Ready to Join our team?  Click HERE  for more information. One of the perks of being a demonstrator is to pre-order before a new catalog launches, and the Online Exclusives we get to order before they are released to customers.  You will also be getting at least a 20% discount on purchases. If you love card-making as a hobby, you can still be a demonstrator and get that discount to help get more card-making items,  or you can be like I was and buy Stampin’ Up! products for 10 years before I became wise enough to become a demonstrator to get the discount.  When I think of all the stamping products that 20% would have brought over those 10 years, I cringe.

  Being a part of the Stampin’ Up! Community is one of the best decisions I’ve ever made.  Are you new to papercrafting and cardmaking and don’t know where to start, but would like to join to save?  As I said earlier in this post, I’m here to assist you in any way I can.  Ask me!


Full of Charm

Subscribe May 11 – June 10

Send your loved ones elevated cards with heartfelt sentiments!
• Makes 9 cards: 3 each of 3 designs with 9 coordinating envelopes
• Envelopes and card bases with decorative gold foil
• Precut paper pieces and unique sentiment labels
• Coordinating colors: Berry Burst, Cajun Craze, Early Espresso, Mossy Meadow,
Pretty Peacock (Classic Stampin’ Spot), Timid Tiger
Coordinates with the Floral Charm Suite Collection (item 166141)

Subscribe to the June Paper Pumpkin Kit between 11 May and 10 June by clicking here!


Don’t miss the coordinating
Hugs Abloom Dies Add-On!


Make the most of your Paper Pumpkin kits with the Hugs Abloom Dies add-on! Quickly and cleanly cut out a flower, leaf sprig, sentiment label, or Hugs sentiment to elevate your crafting projects. These additional dies are designed to work with THREE Paper Pumpkin Kits: the Inked Occasions Paper Pumpkin Kit, the Mountain Majesties Paper Pumpkin Kit, and the Full of Charm Paper Pumpkin Kit. Pair these dies with other Stampin’ Up! products for even more creative options!

DETAILS
– 4 dies
– Largest die: 2-1/2″ x 1-1/4″ (6.4 x 3.2 cm)
– Use with a Stampin’ Cut & Emboss Machine (sold separately)

You must be a current Paper Pumpkin subscriber to purchase this item. To become a subscriber, visit www.stampinup.com/paperpumpkin.

Note: Supplies may be limited toward the end of the subscription period.

#166238 $12


Stampin’ Up! Products Used In This Project

Add All to Cart                           


Blue Balloons For Grandpa

This heartwarming story explores loss, love, and the healing power of remembrance. Through the voice of young Octavia, Blue Balloons for Grandpa offers comfort and inspiration to young readers, showing that love never truly fades — it simply changes shape and floats on in our hearts. As each balloon drifts into the sky, Octavia finds comfort, sending her love, wishes, and special memories up high.

Perfect for those looking for creative ways to celebrate cherished memories.


SU DEMO FUN FOLD BLOG HOP MARCH 2024

SU DEMO FUN FOLD BLOG HOP MARCH 2024

SU DEMO FUN FOLD BLOG HOP MARCH 2024

Welcome to the monthly SU Demos Fun Fold Blog Hop Group  with Independent Stampin’ Up! Demonstrators!!

We have a great lineup of talented crafters for you today, who enjoy creating fun folds.  If you love fun folds, I am hoping you find inspiration and enjoyment so much that you will be inspired to join us next time.  You are in for a treat with all the talented demonstrators participating. You can find that list  located at the end of the post about my card creation. 

The card I am sharing today is created using Stampin’ Up! Meadow Dies and Countryside Inn Designer Series Paper.  I suppose you can call this Fun Fold a double flap Fun Fold.  Maybe there is another name so if you know what it is called, please let me know.  Card cuts are at the end of the post.

  • Start with a 4-1/4″ x 11″ Basic White cardstock card base.
  • Score at 5-1/2″ 
  • Cut a 4″ x 5-1/4″  piece of Countryside Inn Designer Series Paper.
  • Cut two pieces of Basic White cardstock 3-1/2″ x 4″
  • Score both pieces 1/2″ on the 4″ side
  • Fold and burnish the two pieces well.
  • Using adhesive of choice put the adhesive on the 1/2″ score edge.
  • Adhere the two pieces as the photo above shows, the 1/2″ scored edge goes on the back side of the Designer Series Paper so it will be hidden when the piece is adhered to the card base.
  • Adhere the piece of Countryside Inn Designer Series Paper to the card base.
  • Using dies from Stampin’ Up! Meadow Dies die cut flowers from Basic White cardstock as shown in the above photo.
  • Adhere the flowers to the two flaps using Stampin’ Dimensionals and Multipurpose Liquid Glue.
  • Stamp a greeting from Stampin’ Up! By My Side on a scrap of Basic White cardstock.
  • Make a loopy bow, adhering to the flap with a glue dot.
  • Adhere the greeting over the bottom of the flowers using Stampin’ Dimensionals.
  • Stamp another greeting, this one from Stampin’ Up! Thoughtful Expressions stamp set in Memento Back ink on a scrap of Basic White cardstock.
  • Die cut the greeting using a die from Perennial Postage Dies. You will have to do some adjusting to get it down to the size shown here.
  • Pop over the bottom of the flowers using  Stampin’ Dimensionals.
  • Open the second flap to reveal a sentiment adhered to the Countryside Inn Designer Series Paper.  A sentiment from Stampin’ Up! Timeless Arrangements stamp set is stamped in Memento Black ink on a piece of Basic White cardstock.
  • Using a die from Perennial Postage dies die cut the sentiment.
  • Adhere the sentiment to the Countryside Inn Designer Series Paper using Multipurpose Liquid Glue or adhesive of choice.
  • On a piece of Basic White cardstock stamp sentiments from Stampin’ Up! Beach Day stamp set and Stampin’ Up! Lazy Days stamp set (this one soon to retire).
  • Adhere a strip of Countryside Inn Designer Series Paper to the bottom of the panel.
  • Adhere the panel to the card base using Multipurpose Liquid Glue or adhesive of choice. 

A Basic White envelope gets a piece of  Countryside Inn Designer Paper adhered to the envelope flap using Multipurpose Liquid Glue.


Now that you’ve seen my card, take a minute to hop thru all our projects today to see even more fun fold inspiration — you can click on each name below to go direct to all the blogs.


Lineup

  1. Karen Finkle
  2. Kathi Ondus
  3. Rae Burnet
  4. Mary Deatherage
  5. Debbie Mageed
  6. Sue Jackson
  7. Shirley Gentry
  8. Lisa Ann Bernard
  9. Maria Jose Mench

Thank you for stopping by today. I hope you took the time to linger and look at my other blog post and cards and that you will join me on my stamping journey as I share my cards with you each day. My hope and wish are that you will be inspired to create amazing creations yourself. Feel free to CAS(E) any card. Any questions you may have, you know you can always contact me. Have a blessed day!


Questions? You can Contact Me.  I’d love to be your Demonstrator if you need any stamping supplies.  Just click on the Shop Now button on the top right side of the screen to go directly to my online store.  You can Shop in my online store HERE

  • Ready to Join our team?  Click HERE  for more information. One of the perks of being a demonstrator is that you get to pre-order before a new catalog  launches so you are able to show your customers what they can look forward to having when the new catalog comes out.  You will also be getting at least a 20% discount on purchases. If you love card making as a hobby, you can still be a demonstrator and get that discount to help get more card making items,  or you can be like I was and buy Stampin’ Up! products for 10 years before I became wise enough to become a demonstrator to get the discount.  When I think of all the stamping products that 20% would have brought over those 10 years, I cringe.
     
  • Want to earn FREE Stampin’ Up! products through the Customer rewards program?  The rewards program is my way of saying thank you for being an online customer.   Click HERE to learn more.       
  • Check out Paper Pumpkin you will love it!  

March 1-31 Host Code  –  C44U26SD

Use this host code when you order $50  or greater and receive a free gift from me!  If your order is over $150, please do not use this code, but you’ll still get the free gift.  The free gift is your choice of any item valued up to $10.00 in any active Catalog.


Delicate Wings

Subscribe March 11 – April 10

Subscribe to Paper Pumpkin for a monthly, all-inclusive crafting kit that’s a fun surprise! Each kit includes a photopolymer stamp set, Classic Stampin’ Spot, and step by step instructions to complete exclusive paper craft projects, including cards, tags, and gift
packaging. And don’t miss the special add-on that coordinates with the next three months!

Send elegant words of encouragement and support to those you love.

  • Makes 9 cards: 3 each of 3 designs with 9 coordinating envelopes
  • Precut paper pieces and butterfly designs
  • Champagne foil images, sentiments, and labels
  • Coordinating colors: Lost Lagoon, Moody Mauve, Basic Beige, Basic Gray
    (Classic Stampin’ Spot), Basic Black, champagne foil

This exclusive add-on (item 164397) coordinates with the three upcoming kits! Paper Pumpkin subscribers can purchase it beginning 11 March. The add-on is available only while supplies last, so it’s best to shop early!

Subscribe to the April Paper Pumpkin Kit between 11 March and 10 April by clicking here!

Note: Supplies may be limited toward the end of the subscription period.


Stampin’ Up! Products Used In Creating This Card

 Card Cuts

  • Basic White cardstock
    • card base — 4-1/4″ x 11″ scored at 5-1/2″
    • flaps  on card front — 3-1/2″ x 4″   (cut 2) score at 1/2″ on 4″ side
    • cadie cut piece on DSP panel  on background panel — 1-1/4″ x 2″ 
    • inside panel — 4″ x 5-1/4″
    • die cuts — 4-1/4″ x 11″
  • Countryside Inn Designer Series Paper
    • background panel — 4-1/4″ x 5-1/4″
    • flaps on front — 3-1/4″ x 3-1/4″ (cut two different patterns)


Let’s Connect

https://campsite.bio/stampinwithshirleyg


Stampin’ Up! Simply Zinnias

Stampin’ Up! Simply Zinnias

My card today that I am sharing is created using one of the new Online Exclusives available in March for customers.  I also, use Stampin’ Up! Thoughtful Expressions stamp set and Stampin’ Up! Softly Sophisticated stamp set and Embossing Folder, a free Sale-a-Bration item.

  1. Start with a Basic White cardstock card base.
  2. Add a panel of Poppy Parade cardstock using Multipurpose Liquid Glue.
  3. Next, add a Basic White cardstock panel that has been embossed using the Softly Sophisticated Embossing Folder, adhere using Multipurpose Liquid Glue.  It shows up as a half  panel.
  4. Cut a panel of Sunny Day Designer Series Paper and cut it at an angle. See photo about for how it was cut.
  5. Stamp a flower image from Stampin’ Up! Simply Zinnia stamp set in Memento Black in on a Basic White panel.
  6. Color the flowers and leaves using Poppy Parade, Daffodil Delight, Granny Apple Green, Mango Melody, and Crumb Cake Stampin’ Blends.
  7. Color the white area around the zinnias in the area where it is placed over the Softly Sophisticated Designer Series Paper so there is not blaring white when you look at the card.
  8. There is a die for the flowers but I fussy cut as I wanted it cut closer.
  9. Cut a thin strip of Basic Black cardstock and a thin strip from a panel of Sunny Days Designer Series Paper.  
  10. Add the strips across the card from covering the area there the Sunny Days Designer Series Paper and the Basic White cardstock panel meet. Use Multipurpose Liquid Glue as the adhesive.
  11. Pop the zinnias over the two thin strips using Stampin’ Dimensionals.
  12. Stamp a greeting from Stampin’ Up! Softly Sophisticated stamp set in Memento Black ink on a piece of Basic White cardstock.
  13. Flag one end of the greeting.
  14. Pop the greeting over the stem of the zinnias using Stampin’ Dimensionals
  15. Pop three Rhinestone Basic Jewels that have been colored using a Poppy Parade Stampin’ Blends.
  16.  On a Basic White cardstock panel stamp a sentiment from Stampin’ Up! Thoughtful Expressions stamp set in Memento Black ink.
  17. Stamp a portion of the same stamp used for the card front in the lower right corner of the panel using Memento Black ink.
  18. Color the zinnias using the same colors as the ones on the card front.
  19. Using Memento Black ink stamped off twice stamp dots using a dot stamp from Stampin’ Up! Notes of Nature stamp set.
  20. Stamp in Memento Black ink a sentiment from Stampin’ Up! Thoughtful Expressions stamp set.  Stamp the sentiment by the zinnias.
  21. Adhere the Basic White panel to a Poppy Parade cardstock mat, then adhered to the card base using Multipurpose Liquid Glue.
  22. Adhere two Rhinestone Basic Jewels that have been colored using a Poppy Parade Stampin’ Blends
  23. Adhere a panel of Sunny Days Designer Series Paper the flap of a Basic White envelope flap.

These are the challenges I am entering for this card.

Addicted to Stamps and More  –  Make Your Mark

Can You Handle The Pressure Challenge

Ellibelle’s Crafty Wednesday — February Challenge

Freshly Made Sketches #623 – A Sketch by Linda

Thank you for stopping by today. I hope you took the time to linger and look at my other blog post and cards and that you will join me on my stamping journey as I share my cards with you each day. My hope and wish are that you will be inspired to create amazing creations yourself. Feel free to CAS(E) any card. Any questions you may have, you know you can always contact me. Have a blessed day!


Questions? You can Contact Me.  I’d love to be your Demonstrator if you need any stamping supplies.  Just click on the Shop Now button on the top right side of the screen to go directly to my online store.  You can Shop in my online store HERE

  • Ready to Join our team?  Click HERE  for more information. One of the perks of being a demonstrator is that you get to pre-order before a new catalog  launches so you are able to show your customers what they can look forward to having when the new catalog comes out.  You will also be getting at least a 20% discount on purchases. If you love card making as a hobby, you can still be a demonstrator and get that discount to help get more card making items,  or you can be like I was and buy Stampin’ Up! products for 10 years before I became wise enough to become a demonstrator to get the discount.  When I think of all the stamping products that 20% would have brought over those 10 years, I cringe.
     
  • Want to earn FREE Stampin’ Up! products through the Customer rewards program?  The rewards program is my way of saying thank you for being an online customer.   Click HERE to learn more.       
  • Check out Paper Pumpkin you will love it!  

February 1-29 Host Code: WX6HXXZ9

Use this host code when you order $50  or greater and receive a free gift from me!  If your order is over $150, please do not use this code, but you’ll still get the free gift.  The free gift is your choice of any item valued up to $10.00 in any active Catalog.


Memorable Meadows

Subscribe February 11 – March 10

Share nature’s beauty with lovely all-occasion cards!

• Makes 9 cards: 3 each of 3 designs with 9 coordinating envelopes
• Precut vellum pieces & wood embellishments
• Coordinates with the Meandering Meadows Suite Collection (item 162745)
• Coordinating colors: Granny Apple Green, Garden Green (Classic Stampin’ Spot),
Balmy Blue, Night of Navy, Gorgeous Grape, Fresh Freesia

Don’t miss the coordinating Love of Spring Dies add-on!

The dies will coordinate with the January, February and March Paper Pumpkin Kit.

The Love of Spring Dies Add-On—available only while supplies last!

Item # 164396 $12.00


Stampin’ Up! Products Used In Creating This Card

 Card Cuts

  • Basic White card stock
    • card base — 4-1/4″ x  11′ scored at 5-1/2″
    • embossed panel card front — 4″ x 5-1/4″
    • inside panel — 4″ x 5-1/4′
    • zinnas —  4-1/4″ x 8″
  • Poppy Parade cardstock
    • mat card front — 4-1/8″ x 5-3/8″
    • inside mat 4-1/4″ x 5-3/8″
  • Sunny Days Designer Series Paper
    • card front — 3-7/8″ x 5″


Let’s Connect

https://campsite.bio/stampinwithshirleyg

Stampin’ Up! Lovely Lavender

Stampin’ Up! Lovely Lavender

The card I am sharing today is an easel card created used Stampin’ Up! Perennial Lavender Designer Series Paper, Stampin’ Up! Country Bouquet stamp set and Stampin’ Up! Thoughtful Expressions stamp set along with pieces from the January 2024 Paper Pumpkin Lovely Lavender.


  1. The card base is Gorgeous Grape cardstock.
  2. Score and fold the card base to create the easel fold.
  3. A panel of Highland Heather cardstock is adhered to the easel fold.
  4.   A panel from January 2024 Paper Pumpkin Lovely Lavender get a different pattern from the kit adhered in the opening of the panel, it  is adhered to the Highland Heather mat using Stampin’ Dimensionals. 
  5. Lavender and leaves from the kit are arranged in the opening on the Lovely Lavender panel. 
  6. A greeting from Stampin’ Up! Country Bouquet stamp set is stamped in Gorgeous Grape ink on a Basic White cardstock scrap and popped on the card front with a Crumb Cake piece of twine from Baker’s Twine Essential Pack. 
  7. Rhinestone Basic Jewels are colored using a Highland Heather Stampin’ Blends Marker.
  8. A panel of Perennial Lavender Designer Series Paper is adhered to the inside. 
  9. A heart is die cut from the same Designer Series Paper and popped on the panel to create the stop for the easel.
  10. This is how the card looks opened as an easel card.
  11.   On the back of the easel two panel are added that have been die cut using a die from Scallop Contour Dies.
  12.   One of the panels get a sentiment from Stampin’ Up! Thoughtful Expressions stamp set stamped in Gorgeous Grape ink.
  13. A Basic White envelope gets a panel of the Designer Series Paper added to the envelope flap using Multipurpose Liquid Glue.

Thank you for stopping by today. I hope you took the time to linger and look at my other blog post and cards and that you will join me on my stamping journey as I share my cards with you each day. My hope and wish are that you will be inspired to create amazing creations yourself. Feel free to CAS(E) any card. Any questions you may have, you know you can always contact me. Have a blessed day!


Questions? You can Contact Me.  I’d love to be your Demonstrator if you need any stamping supplies.  Just click on the Shop Now button on the top right side of the screen to go directly to my online store.  You can Shop in my online store HERE

  • Ready to Join our team?  Click HERE  for more information. One of the perks of being a demonstrator is that you get to pre-order before a new catalog  launches so you are able to show your customers what they can look forward to having when the new catalog comes out.  You will also be getting at least a 20% discount on purchases. If you love card making as a hobby, you can still be a demonstrator and get that discount to help get more card making items,  or you can be like I was and buy Stampin’ Up! products for 10 years before I became wise enough to become a demonstrator to get the discount.  When I think of all the stamping products that 20% would have brought over those 10 years, I cringe.
     
  • Want to earn FREE Stampin’ Up! products through the Customer rewards program?  The rewards program is my way of saying thank you for being an online customer.   Click HERE to learn more.       
  • Check out Paper Pumpkin you will love it!  

February 1-29 Host Code: WX6HXXZ9

Use this host code when you order $50  or greater and receive a free gift from me!  If your order is over $150, please do not use this code, but you’ll still get the free gift.  The free gift is your choice of any item valued up to $10.00 in any active Catalog.


Memorable Meadows

Subscribe February 11 – March 10

Share nature’s beauty with lovely all-occasion cards!

• Makes 9 cards: 3 each of 3 designs with 9 coordinating envelopes
• Precut vellum pieces & wood embellishments
• Coordinates with the Meandering Meadows Suite Collection (item 162745)
• Coordinating colors: Granny Apple Green, Garden Green (Classic Stampin’ Spot),
Balmy Blue, Night of Navy, Gorgeous Grape, Fresh Freesia

Don’t miss the coordinating Love of Spring Dies add-on!

The dies will coordinate with the January, February and March Paper Pumpkin Kit.

The Love of Spring Dies Add-On—available only while supplies last!

Item # 164396 $12.00


Stampin’ Up! Products Used In Creating This Card

 Card Cuts

  • Gorgeous Grape cardstock
    • card base — 4-1/4″ x 11″ scored at 2-3/4″ & 5-1/2″
  • Highland Heather card stock
    • mat on card front & inside — 4-1/8″ x 5-3/8″
  • Basic White cardstock
    • die cut 2 — 4-1/2″ x 5-3/4″
  • Perennial Lavender Designer Series Paper
    • inside panel — 4″ x 5-1/4″


Let’s Connect

https://campsite.bio/stampinwithshirleyg