Browsed by
Tag: Stampin’ Up! Canton GA

Stampin’ Up! Thoughtful Wishes

Stampin’ Up! Thoughtful Wishes

The card I am sharing today is created using Stampin’ Up! Thoughtful Wishes stamp set and Dies.  This is another new stamp set for me from the 2024-2025 Annual Catalog.  I also used Exposed Brick 3D Embossing Folder and Thoughtful Journey Designer Series Paper.

Challenges:

Can You Handle The Pressure  

Four Seasons Challenge  

Sunday Stamps      

I started with a Pretty Peacock cardstock card base with a panel of the same embossed using Exposed Brick 3D Embossing Folder.  The embossed panel is adhered to the card base using Multipurpose Liquid Glue.

I cut tow panels of Designer Series Paper from Thoughtful Journey Designer Series Paper, choosing two different patterns.  I also cut a strip of the Designer Series Paper and cut each end creating a banner strip.  The first panel of Thoughtful Journey Designer Series Paper is adhered using Multipurpose Liquid Glue, the second one is popped on at a slight angle using Stampin’ Dimensionals.  Two sprigs of flowers are die cut using dies from Thoughtful Journey Dies, one is die cut from Basic White cardstock the other from a scrap of Thoughtful Journey Designer Series Paper.  Pretty Peacock sequins from Adhesive Backed Sequin Trio are popped around the card front.  

A panel of Basic White cardstock is stamped with flowers using a stamp from Stampin’ Up! Thoughtful Wishes stamp set and Pretty Peacock ink.  They are colored using Wild Wheat and Pool Party  Stampin’ Blends.

A Basic White envelope gets a piece  of Thoughtful Journey Designer Series Paper adhered to the envelope flap using Multipurpose Liquid Glue.

Thank you for stopping by today. I hope you took the time to linger and look at my other blog post and cards and that you will join me on my stamping journey as I share my cards with you each day. My hope and wish are that you will be inspired to create amazing creations yourself. Feel free to CAS(E) any card. Any questions you may have, you know you can always contact me. Have a blessed day!


Questions? You can Contact Me.  I’d love to be your Demonstrator if you need any stamping supplies.  Just click on the Shop Now button on the top right side of the screen to go directly to my online store.  You can Shop in my online store HERE

  • Ready to Join our team?  Click HERE  for more information. One of the perks of being a demonstrator is that you get to pre-order before a new catalog  launches so you are able to show your customers what they can look forward to having when the new catalog comes out.  You will also be getting at least a 20% discount on purchases. If you love card making as a hobby, you can still be a demonstrator and get that discount to help get more card making items,  or you can be like I was and buy Stampin’ Up! products for 10 years before I became wise enough to become a demonstrator to get the discount.  When I think of all the stamping products that 20% would have brought over those 10 years, I cringe.
     
  • Want to earn FREE Stampin’ Up! products through the Customer rewards program?  The rewards program is my way of saying thank you for being an online customer.   Click HERE to learn more.       
  • Check out Paper Pumpkin you will love it!  

May 1-31 Host Code  – WZZW6ZJ3

Use this host code when you order $50  or greater and receive a free gift from me!  If your order is over $150, please do not use this code, but you’ll still get the free gift.  The free gift is your choice of any item valued up to $10.00 in any active Catalog.


The Best There Is

Subscribe April 11 – May 10

Subscribe to Paper Pumpkin for a monthly, all-inclusive crafting kit that’s a fun surprise! Each kit includes a photopolymer stamp set, Classic Stampin’ Spot, and step by step instructions to complete exclusive paper craft projects, including cards, tags, and gift
packaging. And don’t miss the special add-on that coordinates with the next three months!

Make cards for Father’s Day and more to express your gratitude and admiration!

  • Makes 9 cards: 3 each of 3 designs with 9 coordinating envelopes
  • Precut paper accent pieces and labels
  • Woodgrain textures and masculine earthy tones
  • Coordinating colors: Wild Wheat, Pool Party, Misty Moonlight (Classic Stampin’ Spot),
    Early Espresso, Crumb Cake, Basic Beige
    Thanks & Beyond Dies Add-On—available only while supplies last!
    Partial pop-ups to make your cards shine! Coordinates with the Country Woods Designer Series Paper (item 163393)

Thanks and Beyond Add On Dies

Dies #164397 Price $12.00

This exclusive add-on coordinates with the three upcoming kits! Paper Pumpkin subscribers can purchase it beginning 11 March. The add-on is available only while supplies last, so it’s best to shop early!

Subscribe to the May Paper Pumpkin Kit between April 11 and May 10 by clicking here!

Note: Supplies may be limited toward the end of the subscription period.


 Starter Kit Special Starting May 1st

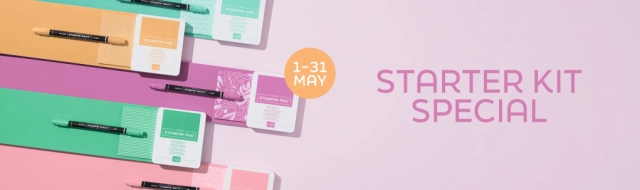
Exciting News! Between 1–31 May, anyone who becomes a Stampin’ Up! demonstrator will receive four 2024–2026 In Color products in their Starter Kit for FREE!

In addition to the 2024-2026 In-Color products, new demonstrators will pick $125 USD worth of products of their choice. You will also receive free business supplies and free shipping. Not to mention all the fun that comes with being a part of our wonderful crafting community.

When you join as a new demonstrator, all In Color products will be automatically added to your Starter Kit. 

STARTER KIT SPECIAL DETAILS

  • Promotion Start Date:  May 1, 2024
  • Deadline to Join:  May 31, 2024 at 11:59 PM MT
  • In addition to the regular $125 worth of products of your choice for just $99, new demonstrators will receive the following products (an $82 value!!) in their Starter Kit at no additional cost:
    • 2024–2026 In Color Classic Stampin’ Pad Bundle
    • 2024–2026 In Color 8-1/2″ x 11″ Card Stock
    • 2024–2026 In Color 6″ x 6″ Designer Series Paper
    • 2024–2026 In Color Stampin’ Write Markers
  • All Starter Kits ship for FREE!!

If you’d like to join our team, we’d love to have you!  Once you join, you’ll get at least a 20% discount on all of your Stampin’ Up! purchases and you can preorder from the upcoming catalogs!

We welcome all types of Demonstrators from those only purchasing to get the discount for themselves to those who want to run a business and those anywhere in between!  We’re a relaxed group that loves to stamp with no pressure to sell!

Demonstrators get lots of perks including at least a 20% discount on all orders that you place as a Demonstrator, invitations to Stampin’ Up! Demonstrator events and preordering from upcoming catalogs and promotions!

There is no commitment and no penalty if you decide that being a Demonstrator isn’t right for you.  Why not give it a try?  We have a fun Facebook page where we chat a lot and we do virtual meetings monthly and in-person meetings quarterly.

What a great time to join and get all the new 2024-2026 In-Color products. Contact me shirleygentryis@gmail.com I would love to have you on my team. Contact me today about joining May 1st.  This flyer includes a QR code that is active and links to the Join page. However, the details on the page won’t go live until 1 May.  Click here on May 1-31 to join my team.


Stampin’ Up! Products Used In Creating This Card

 Card Cuts

  • Pretty Peacock cardstock
    • card base — 4-1/4″ x 11″ scored at 5-1/2″
    • embossed panel — 4-1/4″ x 5-1/2″
  • Basic White cardstock
    • inside panel — 4″ x 5-1/4″
    • flower — 2-1/2″ x 4″
  • Thoughtful Journey Designer Series Paper
    • two front panels — 3″ x 4-1/2″
    • greeting — scrap
    • flower — 1-3/4″ x 4″


Stampin’ Up! Fluffiest Friends

Stampin’ Up! Fluffiest Friends


This is a fun card to make.  This is the first time I have used this cute stamp set.  It make a cute and fun card.  The stamp set I am talking about is Stampin’ Up! Fluffiest Friends Stamp Set.  I also used Stampin’ Up! Bee My Valentine, Hooray For Surprises, and Lifetime of Love stamp sets.  I also used a die from Everyday Detail Dies, also the fun Bee Mine Designer Series Paper.

I am joining these challenges for this card.

Addicted To Stamps  — theme this challenge is Any Occasion

Allsorts Challenge  — theme this challenge Keep It Simple

Elliebelle’s Crafty Wednesday — theme  Anything Goes

Never Before Used Schtuff — always use something never used before

Tic Tac Toe Challenge —  Free, Flowers, Ribbon

This is a stack, cut, shuffle card.  I used Bee Mine Designer Series Paper as the paper.  You will need 4 different patterns of paper.  I used only 2 sheets of designer series paper as I used both sides of the paper for my four.  If you use paper with the pattern going a certain direction be sure to cut so it will be in the right direction.  I used a piece of Vellum cut to size and placed it over the two pieces that have the pattern going in one direction.  I drew lines  very lightly with a pencil on the Vellum  so I would be able to see exactly where to cut.

  • Stack your paper the way you want the design to be.
  • Cut all 4 pieces at the same time. I changed my paper trimmer blade to make sure it was sharp to cut all the way through 4 layers.
  • Carefully lay the cut pieces out as you are making 4 card ( you will be, this technique gives you  enough for 4 cards)
  • This is how the other three card fronts will look and it gives you an idea of the layout.
  • Using a die from Everyday Details Dies die cut a circle from Vellum cardstock.  Using the largest circle.
  • Stamp the bear with honey image, the tree branch and the bee hive on a piece of Basic White cardstock using Pecan Pie ink.
  • Die cut the images using dies from Fluffiest Friends Dies.
  • Die cut leaves and grass from Granny Apple Green cardstock using dies from  Fluffiest Friends Dies.
  • Color the images using Crumb Cake, Wild Wheat, and  Sweet Sorbet Blends.
  • Arrange the images over the Vellum circle, adhering with Multipurpose Liquid Glue and Stampin’ Dimensonials.
  • Pop Adhesive Backed Cork Rounds on the card front along with 2023-2025 In Color Dots.
  • Stamp a sentiment from Stampin’ Up! Hooray For Surprises stamp set and Stampin’ Up! Lifetime Of Love stamp set in Memento Black ink on a panel of Basic White cardstock.
  • Fussy cut a bee and honey jars from Bee Mine Designer Series Paper and adhered to the panel using Multipurpose Liquid Glue.
  • A Basic White envelope get a piece of Bee Mine Designer Series Paper adhered to the envelope flap using Multipurpose Liquid Glue.

.Thank you for stopping by today. I hope you took the time to linger and look at my other blog post and cards and that you will join me on my stamping journey as I share my cards with you each day. My hope and wish are that you will be inspired to create amazing creations yourself. Feel free to CAS(E) any card. Any questions you may have, you know you can always contact me. Have a blessed day!


Questions? You can Contact Me.  I’d love to be your Demonstrator if you need any stamping supplies.  Just click on the Shop Now button on the top right side of the screen to go directly to my online store.  You can Shop in my online store HERE

  • Ready to Join our team?  Click HERE  for more information. One of the perks of being a demonstrator is that you get to pre-order before a new catalog  launches so you are able to show your customers what they can look forward to having when the new catalog comes out.  You will also be getting at least a 20% discount on purchases. If you love card making as a hobby, you can still be a demonstrator and get that discount to help get more card making items,  or you can be like I was and buy Stampin’ Up! products for 10 years before I became wise enough to become a demonstrator to get the discount.  When I think of all the stamping products that 20% would have brought over those 10 years, I cringe.
     
  • Want to earn FREE Stampin’ Up! products through the Customer rewards program?  The rewards program is my way of saying thank you for being an online customer.   Click HERE to learn more.       
  • Check out Paper Pumpkin you will love it!  

March 1-31 Host Code  –  C44U26SD

Use this host code when you order $50  or greater and receive a free gift from me!  If your order is over $150, please do not use this code, but you’ll still get the free gift.  The free gift is your choice of any item valued up to $10.00 in any active Catalog.


Delicate Wings

Subscribe March 11 – April 10

Subscribe to Paper Pumpkin for a monthly, all-inclusive crafting kit that’s a fun surprise! Each kit includes a photopolymer stamp set, Classic Stampin’ Spot, and step by step instructions to complete exclusive paper craft projects, including cards, tags, and gift
packaging. And don’t miss the special add-on that coordinates with the next three months!

Send elegant words of encouragement and support to those you love.

  • Makes 9 cards: 3 each of 3 designs with 9 coordinating envelopes
  • Precut paper pieces and butterfly designs
  • Champagne foil images, sentiments, and labels
  • Coordinating colors: Lost Lagoon, Moody Mauve, Basic Beige, Basic Gray
    (Classic Stampin’ Spot), Basic Black, champagne foil

This exclusive add-on (item 164397) coordinates with the three upcoming kits! Paper Pumpkin subscribers can purchase it beginning 11 March. The add-on is available only while supplies last, so it’s best to shop early!

Subscribe to the April Paper Pumpkin Kit between 11 March and 10 April by clicking here!

Note: Supplies may be limited toward the end of the subscription period.


Stampin’ Up! Products Used In Creating This Card

Card Cuts

  • Sweet Sorbet cardstock
    • card base — 4-1/4″ x 11″ scored at 5-1/2″
  • Basic Black cardstock
    • mat for background piece — 4-1/8″ x 5-3/”
    • inside mat 4″ x 5-1/4″
  • Basic White cardstock
    • inside panel — 3-3/4′ x 5″ 
  • Bee Mine Designer Series Paper
    • 4 pieces for stack, cut, shuffle technique


Let’s Connect

https://campsite.bio/stampinwithshirleyg

SU DEMO FUN FOLD BLOG HOP MARCH 2024

SU DEMO FUN FOLD BLOG HOP MARCH 2024

SU DEMO FUN FOLD BLOG HOP MARCH 2024

Welcome to the monthly SU Demos Fun Fold Blog Hop Group  with Independent Stampin’ Up! Demonstrators!!

We have a great lineup of talented crafters for you today, who enjoy creating fun folds.  If you love fun folds, I am hoping you find inspiration and enjoyment so much that you will be inspired to join us next time.  You are in for a treat with all the talented demonstrators participating. You can find that list  located at the end of the post about my card creation. 

The card I am sharing today is created using Stampin’ Up! Meadow Dies and Countryside Inn Designer Series Paper.  I suppose you can call this Fun Fold a double flap Fun Fold.  Maybe there is another name so if you know what it is called, please let me know.  Card cuts are at the end of the post.

  • Start with a 4-1/4″ x 11″ Basic White cardstock card base.
  • Score at 5-1/2″ 
  • Cut a 4″ x 5-1/4″  piece of Countryside Inn Designer Series Paper.
  • Cut two pieces of Basic White cardstock 3-1/2″ x 4″
  • Score both pieces 1/2″ on the 4″ side
  • Fold and burnish the two pieces well.
  • Using adhesive of choice put the adhesive on the 1/2″ score edge.
  • Adhere the two pieces as the photo above shows, the 1/2″ scored edge goes on the back side of the Designer Series Paper so it will be hidden when the piece is adhered to the card base.
  • Adhere the piece of Countryside Inn Designer Series Paper to the card base.
  • Using dies from Stampin’ Up! Meadow Dies die cut flowers from Basic White cardstock as shown in the above photo.
  • Adhere the flowers to the two flaps using Stampin’ Dimensionals and Multipurpose Liquid Glue.
  • Stamp a greeting from Stampin’ Up! By My Side on a scrap of Basic White cardstock.
  • Make a loopy bow, adhering to the flap with a glue dot.
  • Adhere the greeting over the bottom of the flowers using Stampin’ Dimensionals.
  • Stamp another greeting, this one from Stampin’ Up! Thoughtful Expressions stamp set in Memento Back ink on a scrap of Basic White cardstock.
  • Die cut the greeting using a die from Perennial Postage Dies. You will have to do some adjusting to get it down to the size shown here.
  • Pop over the bottom of the flowers using  Stampin’ Dimensionals.
  • Open the second flap to reveal a sentiment adhered to the Countryside Inn Designer Series Paper.  A sentiment from Stampin’ Up! Timeless Arrangements stamp set is stamped in Memento Black ink on a piece of Basic White cardstock.
  • Using a die from Perennial Postage dies die cut the sentiment.
  • Adhere the sentiment to the Countryside Inn Designer Series Paper using Multipurpose Liquid Glue or adhesive of choice.
  • On a piece of Basic White cardstock stamp sentiments from Stampin’ Up! Beach Day stamp set and Stampin’ Up! Lazy Days stamp set (this one soon to retire).
  • Adhere a strip of Countryside Inn Designer Series Paper to the bottom of the panel.
  • Adhere the panel to the card base using Multipurpose Liquid Glue or adhesive of choice. 

A Basic White envelope gets a piece of  Countryside Inn Designer Paper adhered to the envelope flap using Multipurpose Liquid Glue.


Now that you’ve seen my card, take a minute to hop thru all our projects today to see even more fun fold inspiration — you can click on each name below to go direct to all the blogs.


Lineup

  1. Karen Finkle
  2. Kathi Ondus
  3. Rae Burnet
  4. Mary Deatherage
  5. Debbie Mageed
  6. Sue Jackson
  7. Shirley Gentry
  8. Lisa Ann Bernard
  9. Maria Jose Mench

Thank you for stopping by today. I hope you took the time to linger and look at my other blog post and cards and that you will join me on my stamping journey as I share my cards with you each day. My hope and wish are that you will be inspired to create amazing creations yourself. Feel free to CAS(E) any card. Any questions you may have, you know you can always contact me. Have a blessed day!


Questions? You can Contact Me.  I’d love to be your Demonstrator if you need any stamping supplies.  Just click on the Shop Now button on the top right side of the screen to go directly to my online store.  You can Shop in my online store HERE

  • Ready to Join our team?  Click HERE  for more information. One of the perks of being a demonstrator is that you get to pre-order before a new catalog  launches so you are able to show your customers what they can look forward to having when the new catalog comes out.  You will also be getting at least a 20% discount on purchases. If you love card making as a hobby, you can still be a demonstrator and get that discount to help get more card making items,  or you can be like I was and buy Stampin’ Up! products for 10 years before I became wise enough to become a demonstrator to get the discount.  When I think of all the stamping products that 20% would have brought over those 10 years, I cringe.
     
  • Want to earn FREE Stampin’ Up! products through the Customer rewards program?  The rewards program is my way of saying thank you for being an online customer.   Click HERE to learn more.       
  • Check out Paper Pumpkin you will love it!  

March 1-31 Host Code  –  C44U26SD

Use this host code when you order $50  or greater and receive a free gift from me!  If your order is over $150, please do not use this code, but you’ll still get the free gift.  The free gift is your choice of any item valued up to $10.00 in any active Catalog.


Delicate Wings

Subscribe March 11 – April 10

Subscribe to Paper Pumpkin for a monthly, all-inclusive crafting kit that’s a fun surprise! Each kit includes a photopolymer stamp set, Classic Stampin’ Spot, and step by step instructions to complete exclusive paper craft projects, including cards, tags, and gift
packaging. And don’t miss the special add-on that coordinates with the next three months!

Send elegant words of encouragement and support to those you love.

  • Makes 9 cards: 3 each of 3 designs with 9 coordinating envelopes
  • Precut paper pieces and butterfly designs
  • Champagne foil images, sentiments, and labels
  • Coordinating colors: Lost Lagoon, Moody Mauve, Basic Beige, Basic Gray
    (Classic Stampin’ Spot), Basic Black, champagne foil

This exclusive add-on (item 164397) coordinates with the three upcoming kits! Paper Pumpkin subscribers can purchase it beginning 11 March. The add-on is available only while supplies last, so it’s best to shop early!

Subscribe to the April Paper Pumpkin Kit between 11 March and 10 April by clicking here!

Note: Supplies may be limited toward the end of the subscription period.


Stampin’ Up! Products Used In Creating This Card

 Card Cuts

  • Basic White cardstock
    • card base — 4-1/4″ x 11″ scored at 5-1/2″
    • flaps  on card front — 3-1/2″ x 4″   (cut 2) score at 1/2″ on 4″ side
    • cadie cut piece on DSP panel  on background panel — 1-1/4″ x 2″ 
    • inside panel — 4″ x 5-1/4″
    • die cuts — 4-1/4″ x 11″
  • Countryside Inn Designer Series Paper
    • background panel — 4-1/4″ x 5-1/4″
    • flaps on front — 3-1/4″ x 3-1/4″ (cut two different patterns)


Let’s Connect

https://campsite.bio/stampinwithshirleyg


Stampin’ Up! Simply Zinnia — Sending Flowers

Stampin’ Up! Simply Zinnia — Sending Flowers

My card I am sharing today is a CAS of the one Carol Buckalew created at our Team Meeting in March.  She created a beautiful card so that all us members that chose to make a card like hers would have a beauty also.

I am joining Creative Creases Challenge for this card.

  • Start with a  4-1/4″ x 11″  piece of Mossy Meadow cardstock as the card base. 
  • As this is a fun fold, you will need to make a few score lines for folding. 
  • Score at 2-1/4″, 3-5/8″, 7-3/8″ and 8-3/4″. 
  • Fold the cardstock at the score line, the first fold is valley fold, then mountain fold, then mountain fold again and finally the last one is a valley fold.  This will give you the pop-out for the center of the card.

  • Cut 4 pieces of Daffodil Delight cardstock for the mats.  The measurements are at the end of the post. 
  • Cut 3 pieces of  Flowering Zinnias Designer Series Paper.
  • Adhere the Flowering Zinnias Designer Series Paper to the Daffodil Delight mats using Multipurpose Liquid Glue
  • Die cut a piece of Basic White cardstock using a die from Perennial Postage Dies.
  • Stamp a greeting from Stampin’ Up! Simply Zinnias stamp set in Memento Black ink.
  • Die cut a piece of Berry Burst cardstock using a larger die from Perennial Postage Dies.  This is the mat for the greeting.
  • Adhere the two pieces together using Multipurpose Liquid Glue.
  • Adhere all the matted pieces to the card front. See photo above.
  • Stamp 3 Zinnias & leaves using a flower and leaf image from Stampin’ Up! Simply Zinnia stamp set.
  • Stamp one in Gorgeous Grape ink and color with Highland Heather Stampin’ Blends, Stamp one in Melon Mambo ink and color using Melon Mambo Stampin’ Blends, and stamp the last one in Crushed Curry ink and color using Daffodil Delight Stampin’ Blends.
  • Pop the Zinnias  and leaves over the greeting using Stampin’ Dimensionals.
  • Pop Adhesive Backed Shiny Sequins around the card front.
  • Die cut a piece of Basic White  using a die from Perennial Postage Dies & cut a piece of  Daffodil Delight cardstock.
  • Stamp a sentiment from Stampin’ Up! Beach Day stamp set on the Basic White piece using Memento Black ink.
  • Stamp a flower from the same stamp set as the one on the card front in the corner of the Basic White piece.
  • Adhere the two pieces together using Multipurpose Liquid Glue, then adhere to the back of the card.
  • Adhere a piece of Flowering Zinnias Designer Series Paper to a Basic White envelope flap using Multipurpose Glue.

Thank you for stopping by today. I hope you took the time to linger and look at my other blog post and cards and that you will join me on my stamping journey as I share my cards with you each day. My hope and wish are that you will be inspired to create amazing creations yourself. Feel free to CAS(E) any card. Any questions you may have, you know you can always contact me. Have a blessed day!


Questions? You can Contact Me.  I’d love to be your Demonstrator if you need any stamping supplies.  Just click on the Shop Now button on the top right side of the screen to go directly to my online store.  You can Shop in my online store HERE

  • Ready to Join our team?  Click HERE  for more information. One of the perks of being a demonstrator is that you get to pre-order before a new catalog  launches so you are able to show your customers what they can look forward to having when the new catalog comes out.  You will also be getting at least a 20% discount on purchases. If you love card making as a hobby, you can still be a demonstrator and get that discount to help get more card making items,  or you can be like I was and buy Stampin’ Up! products for 10 years before I became wise enough to become a demonstrator to get the discount.  When I think of all the stamping products that 20% would have brought over those 10 years, I cringe.
     
  • Want to earn FREE Stampin’ Up! products through the Customer rewards program?  The rewards program is my way of saying thank you for being an online customer.   Click HERE to learn more.       
  • Check out Paper Pumpkin you will love it!  

March 1-31 Host Code  –  C44U26SD

Use this host code when you order $50  or greater and receive a free gift from me!  If your order is over $150, please do not use this code, but you’ll still get the free gift.  The free gift is your choice of any item valued up to $10.00 in any active Catalog.


Delicate Wings

Subscribe March 11 – April 10

Subscribe to Paper Pumpkin for a monthly, all-inclusive crafting kit that’s a fun surprise! Each kit includes a photopolymer stamp set, Classic Stampin’ Spot, and step by step instructions to complete exclusive paper craft projects, including cards, tags, and gift
packaging. And don’t miss the special add-on that coordinates with the next three months!

Send elegant words of encouragement and support to those you love.

  • Makes 9 cards: 3 each of 3 designs with 9 coordinating envelopes
  • Precut paper pieces and butterfly designs
  • Champagne foil images, sentiments, and labels
  • Coordinating colors: Lost Lagoon, Moody Mauve, Basic Beige, Basic Gray
    (Classic Stampin’ Spot), Basic Black, champagne foil

This exclusive add-on (item 164397) coordinates with the three upcoming kits! Paper Pumpkin subscribers can purchase it beginning 11 March. The add-on is available only while supplies last, so it’s best to shop early!

Subscribe to the April Paper Pumpkin Kit between 11 March and 10 April by clicking here!

Note: Supplies may be limited toward the end of the subscription period.


Stampin’ Up! Products Used In Creating This Card

 Card Cuts

  • Mossy Meadow cardstock
    • card base — 4-1/4″ x 11″ scored at 2-14″, 3-5/8″, 7-3/8″, and 8-3/4″
  • Daffodil Delight cardstock
    • side mats — 2-1/8″ x 4-1/8″  (cut 2)
    • center mat — 3-5/8″ x 4-1/8″
  • Flowering Zinnias Designer Series Paper
    • side panel — 2″ x 4″ (cut 2)
    • center panel — 3-1/2″ x 4″  
    • envelope flap — 2-1/4″ x 6″
  • Basic White cardstock
    • greeting piece on card front — 2″ x 2-1/2″ for die cutting
    • card back — 3-1/2″ x 4″
  • Berry Burst cardstock
    • mat for greeting — 2-1/2″ x 3-1/4″ for die cutting


Let’s Connect

https://campsite.bio/stampinwithshirleyg

Krafty Chicks Challenge #708

Krafty Chicks Challenge #708


Krafty Chicks Challenge #708 —  CAS — Clean and Simple  — Diane

I have the honor of being the Guest Chick for Krafty Chicks Challenge for the month of March.   This is week  three and the theme as you can see above is CAS (Clean & Simple).  We so happy you are joining us this week.

My card I am sharing today is created using Stampin’ Up! Quiet Meadow stamp set, along with two other Stampin’ Up! stamp sets, Beach Day and Lazy Days.  I really like the sentiment from these two stamp sets that is the reason I have used them so much recently.  I also, used the Splatters 3D Embossing Folder.


My card base is Basic White cardstock with a panel of the same cardstock embossed using  the Splatters 3D Embossing Folder from Stripes & Splatters 3D Embossing Folders.  A smaller piece of Basic White cardstock is cut and the right side corners are embossed using the same embossing folder.  This piece is laid on the bigger embossed piece and brushed with a Blender Brush that has been swiped through Bubble Bath ink.  The butterfly is also brushed a bit on the wings with the Blender Brush and Bubble Bath ink.

A flower image from Stampin’ Up! Quiet Meadow stamp set is stamped in Memento Black Ink on the smaller of the embossed panels.  The flowers are colored using Bubble Bath, Daffodil Delight and Granny Apple Green Stampin’ Blends.  A greeting from  stamp set is stamped in Memento Black ink on a piece of Basic White cardstock , then die cut using a die from Meadow Dies.  The greeting is popped across the bottom of the flowers using Stampin’ Dimensionals.  Three sequins from Adhesive Backed Shiny Sequins are popped around the card front and on the butterfly.  The butterfly is adhered with a glue dot just at the edge of the flower piece.

A greeting from Stampin’ Up! Beach Day stamp set and Stampin’ Up! Lazy Days stamp set is stamped on a panel of Basic White cardstock in Memento Black ink.  A flower like the one on the card front is stamped on the right side of the panel and colored using Bubble Bath, Daffodil Delight, and Granny Apple Green Stampin’ Blends.

A Basic White envelope gets the same image as the card front stamped  to the envelope flap and the corner of the envelope front and colored.

Thank you for stopping by today. I hope you took the time to linger and look at my other blog post and cards and that you will join me on my stamping journey as I share my cards with you each day. My hope and wish are that you will be inspired to create amazing creations yourself. Feel free to CAS(E) any card. Any questions you may have, you know you can always contact me. Have a blessed day!


Questions? You can Contact Me.  I’d love to be your Demonstrator if you need any stamping supplies.  Just click on the Shop Now button on the top right side of the screen to go directly to my online store.  You can Shop in my online store HERE

  • Ready to Join our team?  Click HERE  for more information. One of the perks of being a demonstrator is that you get to pre-order before a new catalog  launches so you are able to show your customers what they can look forward to having when the new catalog comes out.  You will also be getting at least a 20% discount on purchases. If you love card making as a hobby, you can still be a demonstrator and get that discount to help get more card making items,  or you can be like I was and buy Stampin’ Up! products for 10 years before I became wise enough to become a demonstrator to get the discount.  When I think of all the stamping products that 20% would have brought over those 10 years, I cringe.
     
  • Want to earn FREE Stampin’ Up! products through the Customer rewards program?  The rewards program is my way of saying thank you for being an online customer.   Click HERE to learn more.       
  • Check out Paper Pumpkin you will love it!  

March 1-31 Host Code  –  C44U26SD

Use this host code when you order $50  or greater and receive a free gift from me!  If your order is over $150, please do not use this code, but you’ll still get the free gift.  The free gift is your choice of any item valued up to $10.00 in any active Catalog.


Delicate Wings

Subscribe March 11 – April 10

Subscribe to Paper Pumpkin for a monthly, all-inclusive crafting kit that’s a fun surprise! Each kit includes a photopolymer stamp set, Classic Stampin’ Spot, and step by step instructions to complete exclusive paper craft projects, including cards, tags, and gift
packaging. And don’t miss the special add-on that coordinates with the next three months!

Send elegant words of encouragement and support to those you love.

  • Makes 9 cards: 3 each of 3 designs with 9 coordinating envelopes
  • Precut paper pieces and butterfly designs
  • Champagne foil images, sentiments, and labels
  • Coordinating colors: Lost Lagoon, Moody Mauve, Basic Beige, Basic Gray
    (Classic Stampin’ Spot), Basic Black, champagne foil

This exclusive add-on (item 164397) coordinates with the three upcoming kits! Paper Pumpkin subscribers can purchase it beginning 11 March. The add-on is available only while supplies last, so it’s best to shop early!

Subscribe to the April Paper Pumpkin Kit between 11 March and 10 April by clicking here!

Note: Supplies may be limited toward the end of the subscription period.


Stampin’ Up! Products Used In Creating This Card

Meadow Dies

$38.00

 Card Cuts

  • Basic White cardstock
    • card base — 4-1/4″ x 11″ scored at 5-1/2″
    • embossed panel — 4-1/4′ x 5-1/2″
    • art piece — 2-1/4′ x 4-1/4″
    • inside panel — 4′ x 5-1/4″


Let’s Connect

https://campsite.bio/stampinwithshirleyg