Browsed by
Category: Anniversary

Stampin’ Up! Heartfelt Hexagon, Layering Leaves, Sketched Butterflies, Sweetly Scripted

Stampin’ Up! Heartfelt Hexagon, Layering Leaves, Sketched Butterflies, Sweetly Scripted

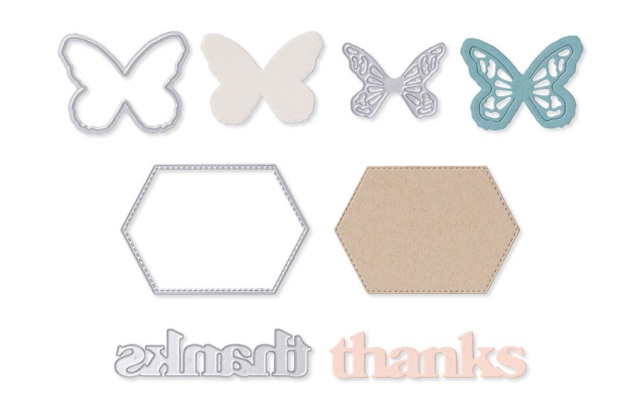
The card I am sharing today is similar to one I created in July.  I like this design and decided to use the design to create an anniversary card for a friend.  I used several Stampin’ Up! stamp sets in creating this card.  I used Heartfelt Hexagon, Layering Leaves, Sketched Butterflies, and Sweetly Scripted Stamp Sets.  I also used Painted Texture 3D Embossing Folder, which will be retiring soon.

These are the card cuts

  • Basic White cardstock
    • card base —  5-1/2′ x 8-1/2″  scored at 4-1/4″
    • inside layer — 4″ x 5-1/4″
    • long mat on card front — 2-1/2′ x 4-1/2″
    • mat for left square on card front — 2-3/4″ x 2-3/4″
    • greeting — 2′ x 2″
    • butterflies — 1-3/4″ x 4″
  • Night of Navy cardstock
    • background panel card front  — 4″ x 5-1/4″
    • greeting mat — 2-1/4″ x 2-1/4″
    • inside panel  — 4″ x 5-1/4″
  • Country Woods Designer Series Paper
    • background piece behind two squares — 2-1/4″ x 4-1/4″
    • left square — 2-1/2″ x 2-1/2″
    • envelope flap — 2-1/4″ x 6″

Emboss the Night of Navy panel using Painted Texture  3D Embossing Folder.  After embossing drag the Whisper White Craft ink pad across the embossing to give more texture to the piece.  Adhere the panel to the card base using Multipurpose Liquid Glue. Die cut butterflies from Sketched Butterflies Dies from Basic White cardstock. Stamp a greeting from Stampin’ Up! Layering Leaves on the 2″ square in Night of Navy ink.  Stamp butterflies from Stampin’ Up! Sketched Butterflies stamp set in the Night of Navy ink also.  Adhered the greeting piece to the Night of Navy mat.  

Adhere the wide strip piece of Country Woods Designer Series Paper to the Basic White mat using Multipurpose Liquid Glue.  Adhere the long piece of Pool Party Country Woods Designer Series Paper to the Basic White mat using Multipurpose Liquid Glue.  Adhere the piece over the Night of Navy background panel using Multipurpose Liquid Glue. Adhere the larger of the two squares with Multipurpose Liquid Glue and the greeting square gets Stampin’ Dimensionals then pop it over the edge of the larger square.  Pop the butterflies on the card front using pieces of Stampin’ Dimensionals.   Pop glossy dots from the Glossy Dot Assortment on two of the butterflies and one on the greeting.

A sentiment from Stampin’ Up! Heartfelt Hexagon stamp set is stamped in Pool Party ink on a Basic White panel.  A border from the same stamp set is stamped in Night of Navy ink.  The happy anniversary sentiment is from Stampin’ Up! Sweetly Scripted Stamp Set and is stamped in Night of Navy ink.  The panel is then adhered to a Night of Navy mat and then to the Basic White card base.

A Basic White envelope gets a panel of Country Woods Designer Series Paper adhered to the envelope flap using Multipurpose Liquid Glue.

I am happy you stopped by today.  I hope you take the time to linger and look at my other blog posts and cards and that you will join me on my stamping journey as I share my cards with you each day. I hope and wish you will be inspired to create amazing creations yourself. Feel free to CAS(E) any card. Any questions you may have, you know you can always contact me. Have a blessed day!


Questions? You can Contact Me.  I’d love to be your Demonstrator if you need any stamping supplies.  Just click on the Shop Now button on the top right side of the screen to go directly to my online store.  You can Shop in my online store HERE

  • Ready to Join our team?  Click HERE  for more information. One of the perks of being a demonstrator is to pre-order before a new catalog launches so you can show your customers what they can look forward to having when the new catalog comes out.  You will also be getting at least a 20% discount on purchases. If you love card-making as a hobby, you can still be a demonstrator and get that discount to help get more card-making items,  or you can be like I was and buy Stampin’ Up! products for 10 years before I became wise enough to become a demonstrator to get the discount.  When I think of all the stamping products that 20% would have brought over those 10 years, I cringe.
     
  • Want to earn FREE Stampin’ Up! products through the Customer rewards program?  The rewards program is my way of saying thank you for being an online customer.   Click HERE to learn more.       
  • Check out Paper Pumpkin you will love it! 

Stampin’ Up! Products Used in This Project


Stampin’ Up! Heartfelt Hexagon

Stampin’ Up! Heartfelt Hexagon

The card I am sharing today is an anniversary card for my grandson and his wife.  I used several stamp sets in creating it, Stampin’ Up! Heartfelt Hexagon Stamp Set, Stampin’ Up! Unbounded Love Stamp Set and Stampin’ Up! Frosted Forest Stamp Set and Dies.  I also used Thoughtful Journey Designer Series Paper and Timber 3D Embossing Folder and Stylish Shapes Dies.

Card Cuts:

  • Basic White cardstock
    • card base — 4-14″ x 11″ scored at 5-1/2″
    • embossed panel card front — 3/4″ x 5″
    • inside panel — 3-3/4″ x 5″
    • trees card front — 4″x 4″
    • greeting card front — scrap
  • Misty Moonlight cardstock
    • mat card front and inside — 4″ y  5-1/4″
    • scrap for mat for tree on card front
  • Thoughtful Journey Designer Series Paper
    • backgound piece card front  — 3-3/4″ x 5″

Die cut a circle in a piece of the Basic White cardstock using the largest die from Stylish Shapes Dies.  Emboss the panel using Timber 3D Embossing Folder.  Adhere the trees die cut using a die from Frosted Forest Dies to the circle using Multipurpose Liquid Glue.  The tips of the trees are outside the circle on the embossed panel. Adhere the embossed panel to the Thoughtful Journey Designer Series Panel using Multipurpose Liquid Glue Liquid Glue. Add the die cut tree that has been die cut using a die Frosted Forest Dies to the right corner of the embossed panel.  Stamp a greeting from Stampin’ Up! Unbounded Love Stamp set  in Misty Moonlight ink on a scrap of Basic White cardstock.  Trim the greeting then pop on the card front using Stampin’ Dimensionals.  Pop gems from Tinsel Gems Three Pack around the card front.

Stamp a sentiment from Stampin’ Up! Heartfelt Hexagon Stamp Set in Misty Moonlight ink on a panel of Basic White cardstock.  Using a Blending Brush and Mistry Moonlight ink brush over a stencil made of the trees like the ones on the card front.  Adhere the panel to a Misty Moonlight cardstock panel, then adhered to the card base using Multipurpose Liquid Glue.

A Basic White envelope gets a panel of Thoughtful Journey Designer Series Paper adhered to the envelope flap using Multipurpose Liquid Glue.

I am happy you stopped by today.  I hope you take the time to linger and look at my other blog posts and cards and that you will join me on my stamping journey as I share my cards with you each day. My hope and wish are that you will be inspired to create amazing creations yourself. Feel free to CAS(E) any card. Any questions you may have, you know you can always contact me. Have a blessed day!


Questions? You can Contact Me.  I’d love to be your Demonstrator if you need any stamping supplies.  Just click on the Shop Now button on the top right side of the screen to go directly to my online store.  You can Shop in my online store HERE

  • Ready to Join our team?  Click HERE  for more information. One of the perks of being a demonstrator is that you get to pre-order before a new catalog  launches so you are able to show your customers what they can look forward to having when the new catalog comes out.  You will also be getting at least a 20% discount on purchases. If you love card making as a hobby, you can still be a demonstrator and get that discount to help get more card making items,  or you can be like I was and buy Stampin’ Up! products for 10 years before I became wise enough to become a demonstrator to get the discount.  When I think of all the stamping products that 20% would have brought over those 10 years, I cringe.
     
  • Want to earn FREE Stampin’ Up! products through the Customer rewards program?  The rewards program is my way of saying thank you for being an online customer.   Click HERE to learn more.       
  • Check out Paper Pumpkin you will love it! 

2 New Kits Now Available

Kits by Stampin’ Up! are perfect for new crafters, busy crafters, or crafters who want quick and easy projects.  All-inclusive project kits have everything you need in one box!  Give as a gift or try them yourself.  Kits are available while supplies last.  Order today!

Nature’s Paintings Kits

Embrace your creative side with the Nature’s Painting Kit.  This unique kit includes everthing you need for a fun creative experience: a coloring book, watercolor pencils, and a water painter.  All you need is some imagination and water!  Create lovely, picturesque images using advanced coloring techniques with this craft kit.  Or make something that’s never been seen before — like green flowers with purple leaves.  Keep it realistic or color outside the lines — it is up to you.  And once you’re done, you can use your finished artwork to create a one-of-akind card front.

Kit Includes:
  • Predesigned projects
  • Line art illustrations
  • Step-by-step instructions
  • 24 watercolor paper pages, 2 each of 12 designs
  • 8 Watercolor Pencils
  • 1 Water Painter
  • Coloring Book 4-1/2″ x 6-1/2″
  • Printed Designer Box for storage or crafting on the go — 9-7/8″ x 6-1/2″ x 1-3/4″

Product Colors: Berry Burst, Coastal Cabana, Daffodil Delight, Early Espresso, Flirty Flamingo, Garden Green, Pumpkin Pie, Red

164982  $25.00


Layered Landscapes Kit

Do you long for the great outdoors but don’t actually want to go outdoors? Then the Layered Landscapes Kit is perfect for you! DIY lovely home decor with this unique kit that includes four 7-1/8″ x 7-1/8″ x 3/4″ (18.1 x 18.1 x 1.9 cm) frames and precut paper pieces. You can either stand the frames up on their included easels or hang them on your wall. Either way, your houseguests are sure to love your new artwork!

Kit includes:
* Predesigned projects
* Step-by-step instructions
* Precut pieces (No prep work! Get right to crafting)
* 4 white frames
* Frame size: 7-1/8″ x 7-1/8″ x 3/4″ (18.1 x 18.1 x 1.9 cm)
* Enough adhesive to complete projects
* A 9-7/8″ x 6-1/2″ x 2-3/4″ (25.1 x 16.5 x 7 cm) printed designer box for storage or crafting on the go

Product colors: Balmy Blue, Basic Beige, Basic Gray, Berry Burst, Cajun Craze, Crumb Cake, Early Espresso, Gray Granite, Lemon Lime Twist, Misty Moonlight, Mossy Meadow, Night of Navy, Old Olive, Pecan Pie, Soft Sea Foam

164981 $25


New Online Exclusive Products Now Available

A new line of products for Online Exclusives are now available! You won’t find these items in any catalog. This is a great opportunity to spark creativity, expand a crafting collection, and discover new opportunities—all from the convenience of the online store.


Notes From The Heart

Subscribe November 11 – December 10

Create cards with hand-sketched botanical designs.
• Makes 9 projects: 3 each of 3 designs
• Precut vellum pieces and sparkling gems
• Scalloped card bases and coordinating envelopes
• Coordinating colors: Blackberry Bliss (Classic Stampin’ Spot), Flirty Flamingo,
Old Olive, Pecan Pie, Pretty in Pink, Very Vanilla

Subscribe to Paper Pumpkin for a monthly, all-inclusive crafting kit that’s a fun surprise! Each kit includes a photopolymer stamp set, Classic Stampin’ Spot, and step by step instructions to complete exclusive paper craft projects, including cards, tags, and gift
packaging. And don’t miss the special add-on that coordinates with the next three months!

Subscribe to the December Paper Pumpkin Kit between 11 November and 10 December by clicking here!


Don’t miss the coordinating
Merry Tags & More Dies Add-On!

Add dimension and detail to your cards, scrapbook pages, and gift tags with the Merry Tags & More Dies! With a leaf and tag shape and Merry sentiment, these dies are a great way to expand your crafting experience. They even coordinate with three Paper Pumpkin Kits: Nests of Christmas, Filled with Joy, and Notes from the Heart. Such easy coordination makes these dies a must-have for any paper craft. Paper Pumpkin subscribers can purchase it beginning 11 September. The add-on is available only while supplies last, so it’s best to shop early! Please note that the Stampin’ Cut and Emboss Machine is not included and can be purchased separately.

#165639 $12

Note: Supplies may be limited toward the end of the subscription period.


Stampin’ Up! Products Used In Creating This Project


Stampin’ Up! Happy Spring

Stampin’ Up! Happy Spring

The card I am  sharing today is a simple and easy card to create.  I used Sweet Thoughts Memories & More Card Pack and Sweet Thoughts Memories & More Cards & Envelopes.  I suppose you could say this is a CAS of Karen Finkle’s card, because her card is the one that gave me the idea for this one.

I am joining the challenge below for this card.

Addicted to Stamps & More 

Creative Creases Challenge    

I used one of the cards from Sweet Thoughts Memories & More Card & Envelopes as the card base.  All the pieces of the card are from Sweet Thoughts Memories & More Card Pack. The card picked for the card front is trimmed to fix the Lost Lagoon cardstock mat.  By matting the card you will not see the back side of the card, just a solid color.

This is a side view of the card showing the easel.  Score the card front at 2-1/8″ to create the easel.  The card front is adhered to the easel using Multipurpose Liquid Glue.  One of the small cards from the pack is trimmed and adhered on the right side of the card front over the floral card.  A white butterfly is popped on the edge of this piece using glue dots.

The word happy is one of the stickers from the card pack.  I matted it on two pieces of Basic White cardstock.  This gives it some dimensional.  It becomes the stop for the easel.  The word Anniversary is stamped in Memento Black ink on a scrap of one of the cards.  It is matted on a scrap of Lost Lagoon cardstock and adhered under the word happy.  Wink of Stella is applied to some of the flowers on the card front. Dragonflies from Dragonflies & Birds are popped around the card front.

A sentiment fr0m Stampin’ Up!  Everlasting Beauty stamp set is stamped in Memento Black ink on a piece of Basic White cardstock and adhered with Multipurpose Liquid Glue.

This is one of the envelopes from the Sweet Thoughts Memories & More Cards & Envelopes.

Thank you for stopping by today. I hope you took the time to linger and look at my other blog post and cards and that you will join me on my stamping journey as I share my cards with you each day. My hope and wish are that you will be inspired to create amazing creations yourself. Feel free to CAS(E) any card. Any questions you may have, you know you can always contact me. Have a blessed day!


Questions? You can Contact Me.  I’d love to be your Demonstrator if you need any stamping supplies.  Just click on the Shop Now button on the top right side of the screen to go directly to my online store.  You can Shop in my online store HERE

  • Ready to Join our team?  Click HERE  for more information. One of the perks of being a demonstrator is that you get to pre-order before a new catalog  launches so you are able to show your customers what they can look forward to having when the new catalog comes out.  You will also be getting at least a 20% discount on purchases. If you love card making as a hobby, you can still be a demonstrator and get that discount to help get more card making items,  or you can be like I was and buy Stampin’ Up! products for 10 years before I became wise enough to become a demonstrator to get the discount.  When I think of all the stamping products that 20% would have brought over those 10 years, I cringe.
     
  • Want to earn FREE Stampin’ Up! products through the Customer rewards program?  The rewards program is my way of saying thank you for being an online customer.   Click HERE to learn more.       
  • Check out Paper Pumpkin you will love it!  

March 1-31 Host Code  –  C44U26SD

Use this host code when you order $50  or greater and receive a free gift from me!  If your order is over $150, please do not use this code, but you’ll still get the free gift.  The free gift is your choice of any item valued up to $10.00 in any active Catalog.


Delicate Wings

Subscribe March 11 – April 10

Subscribe to Paper Pumpkin for a monthly, all-inclusive crafting kit that’s a fun surprise! Each kit includes a photopolymer stamp set, Classic Stampin’ Spot, and step by step instructions to complete exclusive paper craft projects, including cards, tags, and gift
packaging. And don’t miss the special add-on that coordinates with the next three months!

Send elegant words of encouragement and support to those you love.

  • Makes 9 cards: 3 each of 3 designs with 9 coordinating envelopes
  • Precut paper pieces and butterfly designs
  • Champagne foil images, sentiments, and labels
  • Coordinating colors: Lost Lagoon, Moody Mauve, Basic Beige, Basic Gray
    (Classic Stampin’ Spot), Basic Black, champagne foil

This exclusive add-on (item 164397) coordinates with the three upcoming kits! Paper Pumpkin subscribers can purchase it beginning 11 March. The add-on is available only while supplies last, so it’s best to shop early!

Subscribe to the April Paper Pumpkin Kit between 11 March and 10 April by clicking here!

Note: Supplies may be limited toward the end of the subscription period.


Stampin’ Up! Products Used In Creating This Card

Cards Cut

  • Lost Lagoon cardstock
    • mat for card from card pack  — 4″ x 5-3/4″
    •  mat for inside panel — 4″ x 5-3/4″
  • Basic White cardstock
    • sentiment inside — 1-3/4″ x 3″


Let’s Connect

https://campsite.bio/stampinwithshirleyg

Stampin’ Up! Seaside Bay –Thinking Happy Thoughts…

Stampin’ Up! Seaside Bay –Thinking Happy Thoughts…

I hope everyone is having a sunny day even if it is raining where you are, as it is here in Georgia today.  You can always have a happy day and that will make  sunshine in your heart and give you a happy spirit. Give someone your sunny friendly smile today, it maybe the only smile they see the entire day and it will help brighten their rather dreary day.  Have a blessed day where ever you maybe and do.

The card I am sharing today is from the Jan – April 2023 Mini Catalog and it carries over to the new 2023-2024 Annual Catalog coming May 2, 2023.  I have not shared this stamp set very much, so it is good it is carrying over and I will be able to use it until April 30, 2024.

I am entering Tuesday Morning Sketches for this card.  Come join the fun challenges are always fun to do.

I started with a Pool Party card stock card base.  I added a panel of By The Bay Designer Series Paper matted to a panel of Night of Navy card stock.  I adhered this to the card base using Multipurpose Liquid Glue.

I cut a strip of By The Bay Designer Series Paper 1-1/2″ x 5″ matting on Night of Navy card stock.  I adhered this across the card front.

I cut a piece of By the Bay Designer Series for the art piece matting on Night of Navy card stock.  I stamped birds from Stampin’ Up! Lets Set Sail stamp set in the upper right corner using Night of Navy ink.  I adhered this piece to the card front positioning it over the banner.  To this piece I added birds that were either fussy cut from By The Bay Designer Series Paper or stamped in Night of Navy ink using a stamp from Stampin’ Up! Seaside Bay stamp set.  These birds are popped on the bottom of the art panel using Stampin’ Dimensionals.  Seashells are also fussy cut and popped on the card front. A greeting from Stampin’ Up! On The Farm stamp set is stamped in Night of Navy ink in the left corner.  Iridescent Rhinestone Basic Jewels are popped around the card front.  This finishes the card front, now on to creating the inside panel to write a note or sentiment.

A panel of By The Bay Designer Series Paper is matted on Night of Navy card stock after having seashells and a bird stamp across the bottom of the panel.  The shells are stamped in Crumb Cake ink and the bird is stamped in Night of Navy ink. Even with the design on the panel it is light enough to write a message.  This finishes the inside of the card, now on to making sure there is no naked envelope.

Basic White Medium Envelope gets a piece of By The Bay Designer Series Paper applied to the envelope flap using Multipurpose Liquid Glue.

Thank you for stopping by today. I hope you took the time to linger and look at my other blog post and cards and that you will join me on my stamping journey as I share my cards with you each day. My hope and wish are that you will be inspired to create amazing creations yourself. Feel free to CAS(E) any card. Any questions you may have, you know you can always contact me. Have a blessed day!


Questions? You can Contact Me.  I’d love to be your Demonstrator if you need any stamping supplies.  Just click on the Shop Now button on the top right side of the screen to go directly to my online store.  You can Shop in my online store HERE

  • Ready to Join our team?  Click HERE  for more information. 
  • Want to earn FREE Stampin’ Up! products through the Customer rewards program?  The rewards program is my way of saying thank you for being an online customer.   Click HERE to learn more       
  • Check out Paper Pumpkin you will love it!  

April 15-30 Host Code: VB7V429M

 Use this host code when you order $50  or greater and receive a free gift from me!  If your order is over $150, please do not use this code, but you’ll still get the free gift.  The free gift is your choice of any item valued up to $10.00 in any active Catalog.


Say hello to mountain landscapes and new In Colors! This month’s kit features nine outdoors-themed cards in our new 2023–2025 In Colors plus exclusive FREE stickers.  We all love FREE! Want more? Get the cards & envelopes add-on (available 2 May while supplies last) and continue your creative adventure!

ABOUT THE KIT

Name: Exploring In Color

This kit includes:

  • All the supplies you need to create 9 card, 3 each of 3 designs, plus 9 coordinating envelopes.
  • A 7-piece all-occasion stamp set that celebrates good friends and great adventures!
  • 1 Copper Clay (new In Color!) Classic Stampin’ Spot.
  • Twine and die-cut accents
  • FREE stickers to put on your projects or anything you want—water bottles, laptops, coolers, and more!
  • Finished card size: 4-1/4″ x 5-1/2″ (10.8 x 14 cm).
  • Coordinating Stampin’ Up! colors: Boho Blue, Copper Clay, Daffodil Delight, Moody Mauve, Mossy Meadow, Pebbled Path, Wild Wheat

ADD-ON

Exploring In Color Cards & Envelopes

Available starting: 2 May, while supplies last

Price: $10.00 USD | $13.75 CAD

This add-on includes

  • 18 cards, 6 each of 3 designs
  • 18 coordinating envelopes
  • Finished card size: 4-1/4″ x 5-1/2″ (10.8 x 14 cm)

Coordinating Stampin’ Up! colors: Boho Blue, Copper Clay, Daffodil Delight, Moody Mauve, Mossy Meadow, Pebbled Path, Wild Wheat


Stampin’ Up! Products Used in Creating This Card

Card Cuts

  • Pool Party card stock
    • card base — 5-1/2″ x 8-1/2″ scored at 4-1/4″
  • Night of Navy card stock 
    • mat for background panel — 4″ x 5-1/4″
    • mat for inside panel — 4″ x 5-1/4″
    • mat for art piece — 2-1/2″ x 3-1/2″
    • mat for banner — 1-3/4″ x 5-1/4″
  • By The Bay Designer Series Paper
    • art piece — 2-1/4″ x 3-1/4″
    • background panel — 3-3/4″ x 5″
    • inside panel — 3-3/4″ x 5″
    • banner across card front — 1-1/2″ x 5″


Let’s Connect

https://campsite.bio/stampinwithshirleyg

Stampin’ Up! Paper Pumpkin 10 Years of Growth

Stampin’ Up! Paper Pumpkin 10 Years of Growth

Happy Easter everyone, I hope you have had a blessed day.

Today I am sharing four of the cards I created using March 2023 Paper Pumpkin, 10 Years of Growth.  I did a littler altering of the four cards I am showing, I have more to make and will show at a later date.

I used an Orchid Oasis card stock card base.  I cut the card into two pieces adhering the card front to the Orchid Oasis card base.  Adding an Orchid Oasis card base is about the only thing I did to this card other than adding sequins to the front.

I gave this one an Orchid Oasis card base also.  This one is an anniversary card.

This one has a Shaded Spruce card base.  I created the front to look as if you are looking out a window with curtains. I added a linen bow on each side of the curtains using Linen Thread.

This card has a Polished Pink card base. I turned the background panel vertically instead of horizontally as in the directions with Paper Pumpkin.

Thank you for stopping by today. I hope you took the time to linger and look at my other blog post and cards and that you will join me on my stamping journey as I share my cards with you each day. My hope and wish are that you will be inspired to create amazing creations yourself. Feel free to CAS(E) any card. Any questions you may have, you know you can always contact me. Have a blessed day!


Questions? You can Contact Me.  I’d love to be your Demonstrator if you need any stamping supplies.  Just click on the Shop Now button on the top right side of the screen to go directly to my online store.  You can Shop in my online store HERE

  • Ready to Join our team?  Click HERE  for more information. 
  • Want to earn FREE Stampin’ Up! products through the Customer rewards program?  The rewards program is my way of saying thank you for being an online customer.   Click HERE to learn more       
  • Check out Paper Pumpkin you will love it!  

April 1-15 Host Code: FJCWNBWF

 Use this host code when you order $50  or greater and receive a free gift from me!  If your order is over $150, please do not use this code, but you’ll still get the free gift.  The free gift is your choice of any item valued up to $10.00 in any active Catalog.


Good things take time, but you can start creating them now with the All the Little Things Paper Pumpkin kit! This kit includes nine cards, three each of three designs, with elegant designs and bright colors. The iridescent foil is the shining detail to bring your crafts together. You can make a card for anyone and for any occasion!

And don’t wait, because anyone who subscribes to this month’s kit will get a FREE box organizer! This organizer fits perfectly inside your Paper Pumpkin box and is great for keeping your supplies from past kits organized, so you know right where everything is! 

This kit includes:

  • 9 cards, 3 each of 3 designs, and 9 coordinating envelopes.
  • 1 photopolymer stamp set with celebratory sentiments.
  • 1 Shaded Spruce Stampin’ Spot.
  • Precut cherry blossom paper pieces with iridescent foil.
  • Unique embellishments and twine.
  • Adhesives to complete the projects.
  • Final card size: 5-1/2” x 4-1/4” (14 x 10.8 cm). 
  • Coordinating Stampin’ Up! colors: Balmy Blue, Basic Black, Calypso Coral, Granny Apple Green, Petal Pink, Poppy Parade, Shaded Spruce.
  • FREE box organize

Stampin’ Up! Products Used in Creating This Cards

 Card Cuts

  • Shaded Spruce card stock
    • card base — 4-1/4″ x 11″ scored at 5-1/2″
  • Polished Pink card stock
    • card base — 4-1/4″ x 11″ scored at 5-1/2″
  • Orchid Oasis card stock
    • card base — 4-1/4″ x 11″ scored at 5-1/2″

Let’s Connect

https://campsite.bio/stampinwithshirleyg